Friday, February 5, 2016

Anatomy of a Jingle Column

There's a certain sound that some little children's toys have. It's not just a rattle. It's something much more ... it almost sounds like a sweet little chime. It's soft. It's delicate. It's musical. All in all, it's pretty wonderful!
For years, I've been listening to this little sound, wondering how it was made. Then, one day, I decided to do it. *Gulp* Yes. I would dissect a toy to find out what made that sound!!!

First: Here are a couple of  little videos that demonstrate the sound:


This one is found in an owl that came with a play mat.


And this one is in a little duck.

All right. My curiosity got the better of me! I simply had to know what made this wonderful sound! I took a little rabbit toy (he was very obliging when I promised I would stitch him back up again) and, very carefully, I removed the stitches from the bottom.


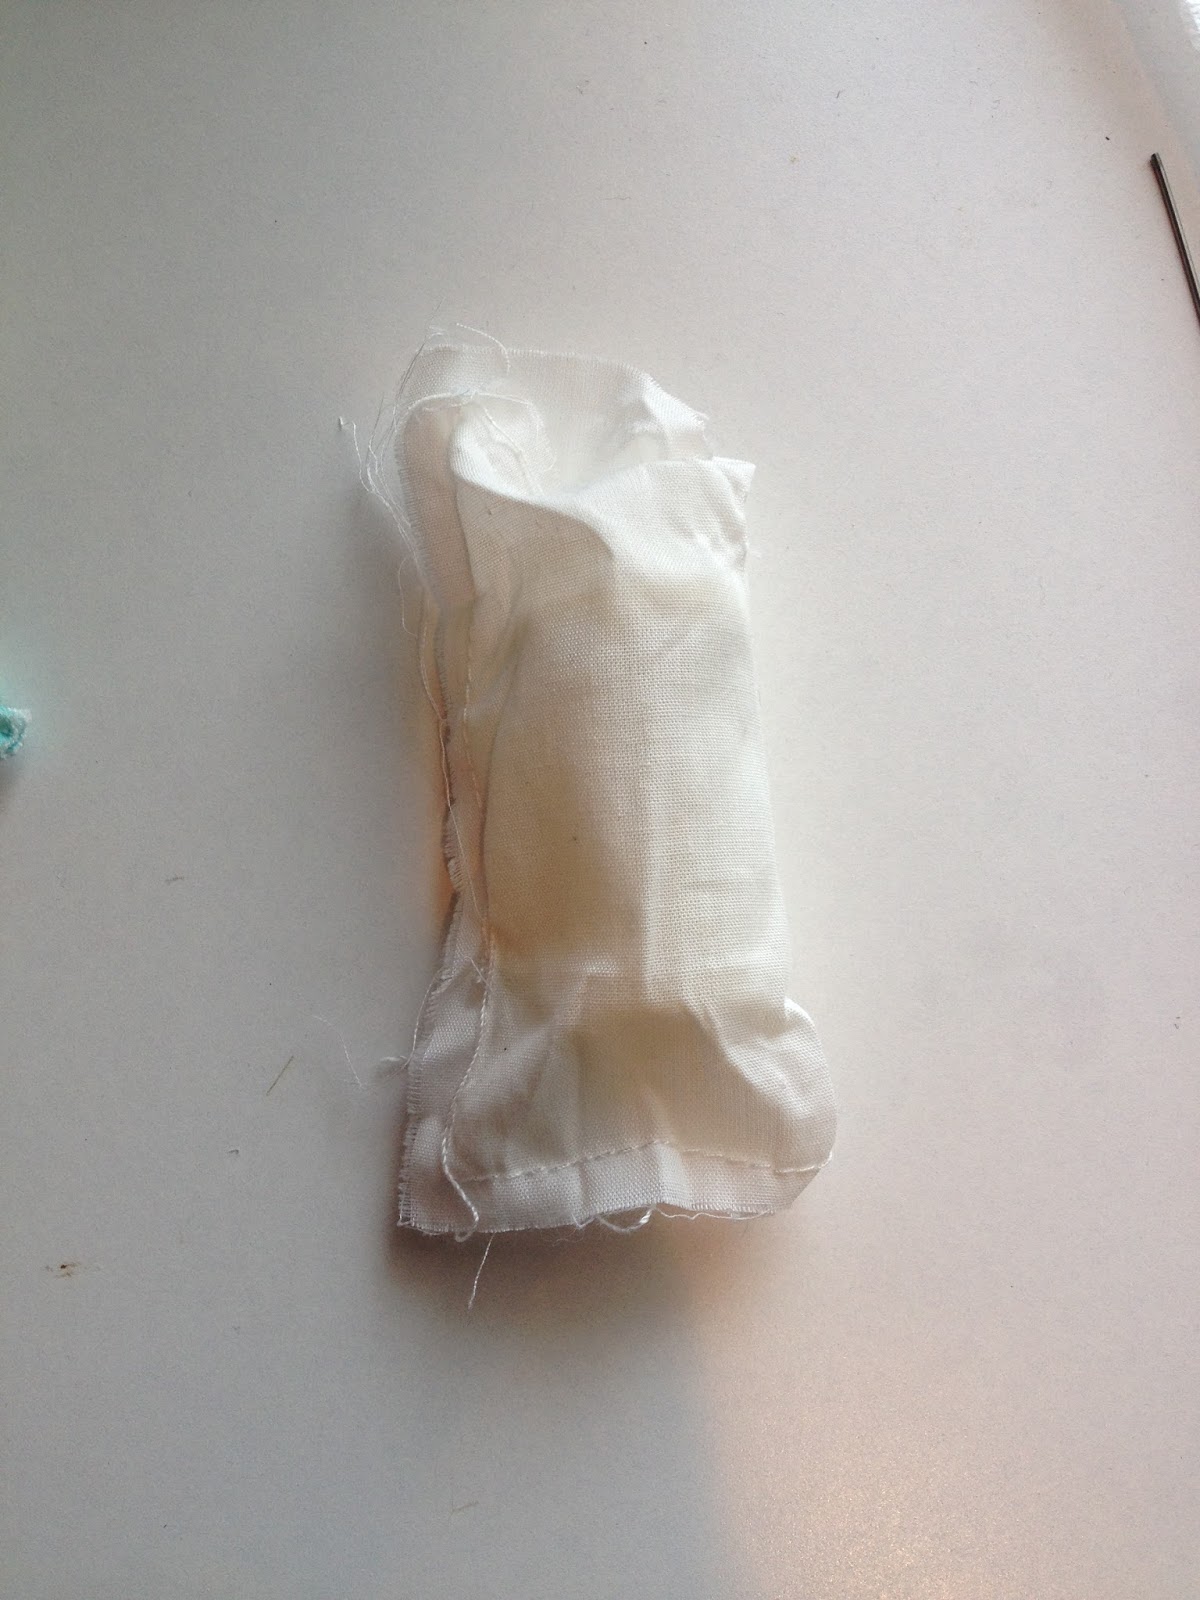
After taking some of the stuffing out, this is what I found:


A little muslin bag ... and inside this bag was:


This small plastic tube, its end glued securely shut. I had to take a pliers and crush it to get it off!

Well ... inside this little tube was ... (drum roll, please):


Wait! What?? When I opened it ... I was amazed! No, SHOCKED! This weird little metal thing is what makes that beautiful sound?? It works kind of like a tee-tiny wind chime. The cotter pin with the flat head moves around when shaken, hitting the metal pins.


So ... the mystery is solved! Strangely, you can't seem to find these to purchase from sellers in the USA. I could only find sellers in Australia/New Zealand ... and from the manufacturer in China. I do think they could be made ... but that's a project for another day!

Saturday, January 23, 2016

Say Hello to Dandy!

Bring a whimsical touch of spring ... and a sprightly splash of color ... to these cold, bleak winter days with this quick knitted/felted flower! Introducing ...


 Dandy
A Sweet Little Flower 
Copyright © 2016 Anita M. Wheeless
What you'll need:
  • 100% wool worsted weight yarn (not superwash!) in green, yellow and fuchsia (or whatever colors you'd like!)
  • Size US 8 double-pointed knitting needles
  • Locking-ring stitch marker (to mark start of round)
  • Regular stitch markers (for marking increases for leaves)
  • Matching thread
  • Scrap yarn or stitch holders
  • Wool stuffing
  • Water-soluble embroidery stabilizer
  • Embroidery floss (use three strands each of black and red for eyes, eyebrows and mouth)
  • Sewing and embroidery needles
  • Optional 18-gauge wire so your flower can bend
  • Lingerie bag
Holding two strands of yarn together, cast 9 stitches onto a size US 8 double-pointed needle. On the first round, divide by knitting three stitches onto each of three needles. Place a locking-ring stitch marker in front of the first stitch on the first needle, joining on the next round.
Knit for 40 rounds.
Round 41: On Needle One, knit 1, place a marker, increase in next, place a marker, knit one (4 stitches)
On Needle 2: Knit the three stitches.
On Needle 3: Knit the three stitches.
Round 42: Needle One: Knit 1, place marker, increase in next, k1, place marker, k1 (5)
Needle 2: Knit (3)
Needle 3: Knit (3)
Round 43: Needle One: Knit 1, place marker, increase in next, k1, place marker, k2 (6)
Needle 2: Knit (3)
Needle 3: Knit (3)
Round 44: Needle One: K1, slip stitches between markers onto waste yarn or a stitch holder (3), then knit the remaining two stitches on the needle (3 stitches on the needle, 3 stitches on the waste yarn)
Needle 2: Knit (3)
Needle 3: Knit (3)
Rounds 45-54: Knit these 10 rounds
Round 55: Needle One: Knit (3)
Needle 2: Knit (3)
Needle 3: K1, place marker, increase in next, place marker, K1 (4)
Round 56: Needle One: Knit (3)
Needle 2: Knit (3)
Needle 3: K1, place marker, increase in next, k1, place marker, K1 (5)
Round 57: Needle One: Knit (3)
Needle 2: Knit (3)
Needle 3: K1, place marker, increase in next, k1, place marker, K2 (6)
Round 58: Needle One: Knit (3)
Needle 2: Knit (3)
Needle 3: k1, slip stitches between markers onto a piece of scrap yarn or a stitch holder, k2. Again, 3 stitches are on the needle and 3 stitches are on the scarp yarn.

Rounds 59-68: Knit these 10 rounds.

Switch to the color yarn you would like to use for Dandy's center (face). 
Round 69: K1, increase in next, k1 (4) on each needle
Round 70: Knit (4 stitches on each needle now)
Round 71: K1, increase in next, k1, increase in next (6) on each needle
Round 72: Knit (6 stitches on each needle)
Round 73: k1, increase in next, k1, increase in next, k1, increase in next (9)
Round 74: Knit (9 stitches on each needle)
Round 75: K2, increase in next, k2, increase in next, k2, increase in next (12 stitches)
Rounds 76-77: Knit these two rounds
Now begin to decrease:
Round 78: k2, k2tog, k2, k2tog, k2, k2tog (9 on each)
Round 79: Knit
Round 80: k1, k2tog, k1, k2tog, k1, k2tog (6 on each)
Round 81: Knit
Round 82: k1, k2tog, k1, k2tog (4 on each)
Round 83: Knit
Round 84: k2tog, k2tog (2 on each)
Bind off ... leaving a little hole for stuffing later.

Back to those hanging stitches! They are the leaves:
Slide the three stitches onto a needle.
Working back and forth:
Row 1: Increase in each stitch (knitting front and back) 6 stitches now.
Row 2: Purl
Row 3: Knit
Row 4: Purl
Row 5: Knit
Row 6: Purl
Row 7: k2tog, k2, ssk
Row 8: Purl
Row 9: k2tog, ssk
Row 10: Purl
Row 11: k2tog
Pull to tighten. Knot off. Cut yarn. Repeat for other leaf.

Now, for the petals!
There will be 7 petals. Each will be knitted back and forth separately. Again, holding two strands of yarn together, choose the color you want for the petals and begin.
Row 1: Pick up 7 stitches along the outer edge of the center you've just finished. 
Row 2: Knit
Row 3: Purl
Row 4: Knit
Row 5: Purl
Row 6: Knit
Row 7: Purl
Row 8: k2tog, knit to last 2, SSK these last two stitches
Row 9: Purl
Row 10: k2tog, k1, SSK (3)
Row 11: Purl
Row 12: k2tog, k1 (2)
Row 13: Purl
Row 14: k2tog (1)
Pull to tighten. Knot off. Cut yarn.

Repeat these 14 rows for each of the remaining petals.

When you have finished, put the flower in a lingerie bag and drop it in the washer. Set your washer on the smallest load with the hottest water. Add tennis balls for more agitation, if you'd like ... and just a little sprinkle of powdered laundry detergent or a drop of liquid laundry detergent. 
Continue to check on your flower about every 5 minutes. It helps keep the flower stem from felting together if you poke a skewer up inside every time you check. 
After the stitch definition has all but melted away into a nice, firm fabric, take your flower out and rinse it. Then, towel it dry.
You can pull it a bit, shaping the petals and the stem.

If you'd like your flower to be able to bend, measure the stem and cut this amount (it will be about 12 inches long) of 16 or 18-gauge wire. Bend the ends under with a needle-nosed pliers. Wrap wool tightly around the wire, completely covering it. Carefully push the covered wire all the way up through the stem as far as it will go. Using more wool, and a wooden skewer, stuff little bits all the way up the stem, around the wire. Also stuff the little flower's face through the tiny hole you've left in the center. When completely stuffed, sew up the center hole and the bottom of the stem, using matching thread.


Embroidering the face:
Take a bit of water-soluble embroidery stabilizer (or just try embroidering freehand) and draw a little face. Pin the stabilizer to the center of the flower. Using three strands of black embroidery floss, first use a satin stitch and embroider the eyes ... and use a back stitch to embroider the eyebrows. 
The mouth is worked with three strands of red embroidery floss. Use a back stitch to to stitch the top of the mouth line and again for a smaller line underneath.

If you've used the stabilizer, you must remove it with boiling water. Remember ... it must be boiling, not just hot if you want to get it all off. (And believe me, you do!) Pour the water over the face.

Set it aside to let it cool and dry. That's it! Stay tuned for Dandy's friend Daisy!!!
Please do let me know if you decide to knit her! As always, if you run into any bumps or trouble spots, please email me and I'll help!


Monday, September 21, 2015

At Last! A New Design: Cone Puppets!

I can't believe how long it's been since I last wrote anything. I have lots of toy patterns waiting to be written up and lots of other projects to share. I moved my website to Shopify at the end of December and had all kinds of great ideas to post more tutorials and feature more designs. As usual, life seems to come at me full force when I'm least expecting it. That's okay, though! What's new? My first little grandson! Born July 16, he's just a little over two months' old and sleeping peacefully (a rarity!) as I write this. And now I have more motivation than ever to keep my toys coming!

After working on my Walkabout finger puppet dolls for two years  I started working on another collection of puppets. I am excited to finally share my pop-up cone puppets! They are composed of only two actual pieces ... the main puppet, knit in the round from bottom to top ... and a covered dowel in the middle that controls the action.
Meet Mr. Rabbit ... styled after Alice in Wonderland's White Rabbit, he even has a waistcoat and pocket watch!

 When popped up, this is what he looks like (above) ... but when you pull the dowel down, you can make him hide!


As with all the pop-up cone puppets, he can also twist right and left ... so, be careful! He likes to keep a close eye on you!

After the rabbit, I experimented with a playful purple cat.


And after that, I decided I would make a whole puppet show full of characters!
So I made a queen, a king, a dragon ... a knight, a wizard, an owl ... and I am still working on getting the princess to look right! Her overskirt is too thick for her to hide properly inside her cone! Next time, I think I will leave it off and embroider her details, instead.


They are a lot of fun ... it's very interesting to experiment, because, just as I found when making the Walkabouts, different dyed wool yarn, even from the same manufacturer, felts or fulls, at different rates. This can sometimes be both challenging and annoying! It takes lots of time to find the consistency that I want when hoping to write up a pattern ... and this is why I make the yarn recommendations I do.
Watch for the patterns ... coming soon!

Sunday, January 18, 2015

A Dish Cloth with a Sunny Disposition!

Sunny Scrubbie
A sweet, little dish cloth
Copyright © 2015 Anita M. Wheeless


An uncomplicated broken-rib stitch gets a fresh face with the addition of pretty eyelet edges. The textured surface is just right for scrubbing your dishes squeaky clean!


Finished size: Approximately 9.5-inches square, after blocking
Needles: Size US 7
Yarn: Lily Sugar and Cream cotton yarn (or any worsted-weight cotton yarn)

Using the long-tail method, cast on 35 stitches.
Row 1: Knit
Row 2: Purl
Row 3: K2 *yo, k2tog, k1 (repeat to end of row)
Row 4: Purl (to end of row)
Row 5: k 5, place marker, k1, *p1, k1 to last 5, place marker, k5
Row 6: Purl (slipping markers as you come to them)
Row 7: k2, yo, k2tog, k1, slip marker, k1, *p1, k1 to last 5, slip marker, k2, yo, k2tog, k1
Row 8: Purl (slipping markers as you come to them)
Repeat rows 5-8 nine times or as many as you’d like! When you’ve reached the desired size, continue as follows:
 After last purl row, repeat row 3 to end of row; purl the next row; knit one row, then bind off, knit-wise.

So cute, maybe it should be for the bath, instead!

Tuesday, October 28, 2014

Experimenting in Needle Felting!

I have been experimenting with needle felting lately ... and am trying my hand at a very basic nativity set.

I made a cone-shaped wire armature and wrapped it in core wool ... this will be the basic form for Mary, Joseph, the three wise men and the shepherd!! The little baby Jesus has a wire head/arm frame, then it's just wool needle felted tightly into a little swaddling blanket. The sheep has a wire armature and then lots and lots of wool over top. This first sheep has stocky legs and no feet at all! Hopefully I'll get better with practice. 

Friday, September 19, 2014

In Loving Memory ...


My Dear Dad
John Frederick Mumm
November 21, 1923
March 17, 2014

It's been six months since my father died and I still have a really hard time writing this little tribute. In June, I quit my job to take on the task of giving away all of his medical equipment, cleaning out the closet, and sorting through over 20 boxes of files, papers and books that we moved to our house when my Dad moved here in August of 2010.

Going through the boxes, I uncovered incredible family photographs, newspaper clippings, decades of canceled checks and receipts ... as well as his notebooks from years of work as a mechanical/nuclear engineer. It really gave me perspective on just what a fabulous man ... a man of faith, courage and integrity ... a loving husband and a wonderful father he was. He was so intelligent ... and yet humble and kind. He was always patient and thoughtful. It's interesting to look at all his accomplishments ... from being a decorated veteran of World War II ... to working on the first nuclear-powered submarine (the Nautilus) ... to designing power plants ... and all the while, he found the time to take my Mom and all five of us children on picnics to the Peaks of Otter in the fall, to Isaac Walton Lake in the summer ... to museum tours and walks around Monticello and Appomattox (he loved history and was especially fascinated by the Civil War period). He was never too busy for us.

At first, it was so completely devastating to throw all of this -- a lifetime of work -- away, but lack of space made it a necessity. Just this week, three months after I started this major clean-out project, I realized, my father's life is not defined by papers and tangible "stuff." None of that defines any of us. The richness of who we are is what we do with our lives and how we affect others. I am so blessed to have had my Mom and my Dad.

Eating his favorite: A banana split!

Christmas morning 2013

Receiving the Distinguished Flying Cross


I found this "creed," attributed to Edgar A. Guest, in one of my father's notebooks. He certainly lived by it.
My Dad on his 90th birthday with my husband, brother and sister.
My Mom and Dad on their wedding day: February 7, 1948. They're now together forever.

Saturday, May 17, 2014

I'm Still Here! Really, I Am!

It's a chilly spring morning and I'm sitting here, sipping my cup of coffee ... and wanting so desperately to let you all know that I'm still here!
I've been through a lot these few months ... culminating in my dear Dad's death in the early morning hours of St. Patrick's Day. I've not had a proper post about him because I've just not been able to bring myself to do it yet ... just like I can't seem to pull myself together to give his clothing away and sort through all of his stuff. Maybe, in the back of my mind, I have a strange feeling that if I leave everything just as it was, maybe he's not really gone forever to this world, but maybe he's just visiting someone and will return. I know, I know, it's ridiculous, but there it is.
I have lots of ideas for new patterns and  projects, but probably my most time-consuming project is the fact that I went back to work (full time, no less!) as a copywriter ... after 26 years of being a stay-at-home mom! I'm not the only one, it seems, who has gone back to work ... after children have gone on to college ... and elderly parents have, sadly, passed away.
So there are many stories I have yet to share ... and a new rescue dog added to the pack, as well (a little Shiba Inu who gets along famously with Sophie, our doodle-mix rescue) ...
But for now, I just wanted to assure anyone with questions about my patterns, or anyone new to my blog or my website The Pattern Box, that I'm still here! And still loving knitting and crafts and being creative and still wanting to share what I can with you!
Thanks for listening and stay posted!